
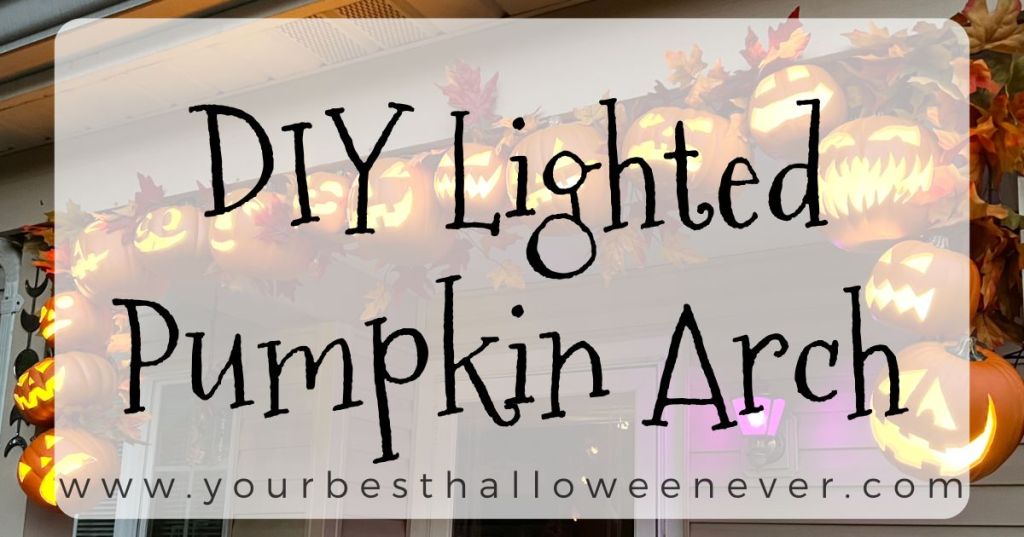
It’s our last DI-Friday of Year Six, and for this season’s final project, we’re going all out with our version of a popular DIY decoration that’s been years in the making!
Would you believe that before this year, we didn’t really decorate the outside of our home very much for Halloween? It’s true! Ever since moving into our new place three years ago, almost all of our decorating has been on the inside with the outside decorations consisting mostly of pumpkins, simple lights, and garlands. But this is the year that changed as we finally took the plunge on creating our very own pumpkin arch!

We’ve talked a few times over the years about making one, but – real talk – those carvable craft pumpkins are expensive. Last November 1st, though, I was able to grab a bunch of them in varying sizes and shapes at a huge post-Halloween discount from Michaels, and thus our DIY Lighted Pumpkin Arch was underway! Devin and I brainstormed a few ideas for it earlier in the season, like what types of jack-o-lantern faces we wanted to include, how we would hang it, and what kinds of lights we would need. As the ideas unfolded and the project started coming together, Devin was feeling especially inspired and ran with it! So without further ado, I’m turning it over so he can tell you all about how he made our DIY Lighted Pumpkin Arch.
So… If you’re going to make this pumpkin arch for yourself, the first thing I’m going to tell you is to know how wide the space is where you’re going to put the arch. Also, don’t have too much of a plan in mind for the order of the pumpkins. You can put them next to each other in any order you want as long as you make sure they will fit in the frame of the entranceway they’re being put up in. We got our pumpkins on sale from Michaels and we made sure they said carvable foam pumpkins. The opening that we had was 8 feet, so I made sure that I knew how wide I could go before I needed to start putting the pumpkins on top of each other.
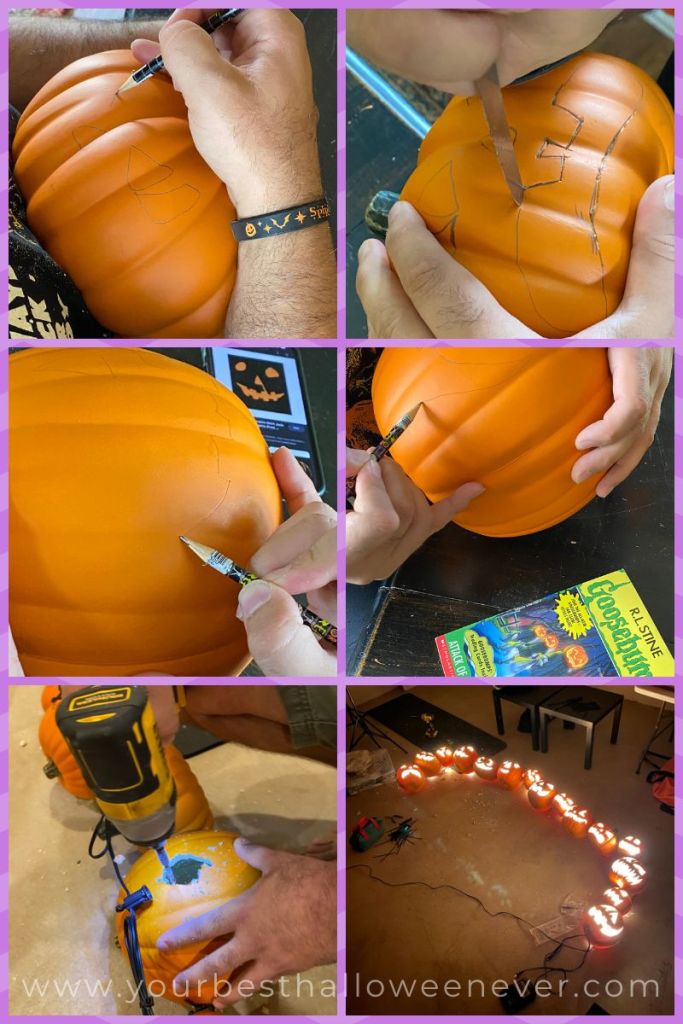
The first thing you’re going to want to do is decide on the type of jack-o’-lantern faces you want… We decided to do a mashup of traditional faces, references from movies and books, and some references from vintage jack-o’-lantern designs. I made sure the faces for the more squat pumpkins fit the face shape while also thinking about the miniature pumpkins, and how the light would shine through those as well… You’ll definitely want to make the faces fit the size of the pumpkin.
Of course we had to use the classic 1978 Halloween Michael Myers jack-o’-lantern face. There is also a face from a Goosebumps book cover, a reference to Over the Garden Wall, and I even pulled a face directly from a plate we have that depicts a jack-o’-lantern trick-or-treater holding a Halloween sign. I played with different shapes, i.e. square triangles, circles, and jagged edges. I also played with degrees of curves in the teeth to create as much differentiation as possible. The carving tools I used were a standard serrated steak knife to make clean long straight cuts and a metal pumpkin carving knife for details because it worked surprisingly well for the foam.

For attaching the pumpkins together, I decided to zip tie them directly to each other. To do this I poked two holes about an inch apart from each other in a vertical fashion on either side of the pumpkins. Then I used a zip tie through each hole on both pumpkins, attaching the zip ties together to create a loop that held the pumpkins together. To do this easily, have small hands or long tweezers to feed the zip tie through the holes to make sure they’re not seen from the outside and snip off any excess. You can place the holes at different heights to make your pumpkins attach in a wobbly hodgepodge, cute fashion.

After attaching the pumpkins together, I rolled them onto the front and used a drill to create holes for the LED garden bulbs that we ordered. We chose the plastic LED bulbs for the safety aspect of them not getting hot and not shattering in high wind weather. We also made sure that the bulbs on the strand were not too close together when ordering to ensure that we had the spacing we needed to attach the pumpkins together. Once I had drilled holes big enough for the bulb to fit through, I drilled a small secondary hole directly above the big hole to use for the clip to hold the light in place, and then I zip tied the cords in a way to hide behind the pumpkins.
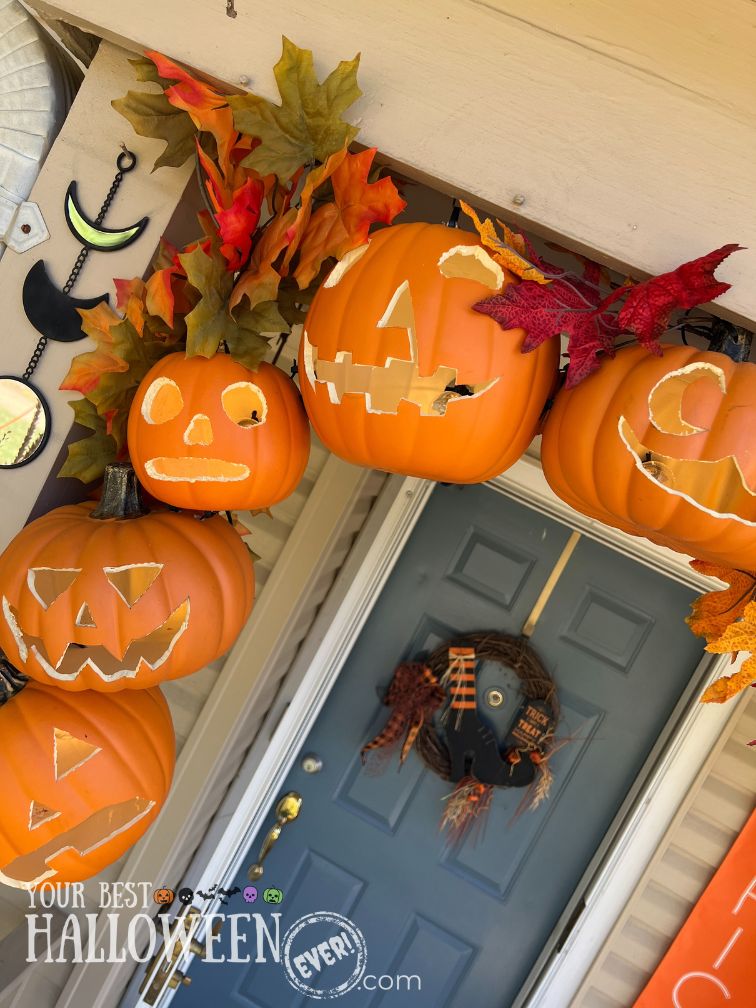
To hang the pumpkins outside, I drilled holes in the stems of all of the center pumpkins to give myself the ability to hang the pumpkins exactly where I needed them. I tapped small, long nails into the trim of our entrance to then ziptie the pumpkins to the nails. I would recommend attaching at least 4 to 5 pumpkins for ultimate stability. I then zip tied the end pumpkins to the posts on either side and then used faux foliage to hide any of the exposed zip ties or cords visible to the human eye.
Luckily, the strand of lights we got has a remote that we can use to turn them on and off, so I highly recommend looking for something similar if you’re wanting to do a lighted pumpkin arch of your own. If you find better ways to hang the pumpkins then right on! This is just how we had to do it since we don’t have the use of gutters or anything like that. And remember: Safety first when using ladders or drills, and be sure to wear gloves or protective clothing to make sure that you do not get hurt.
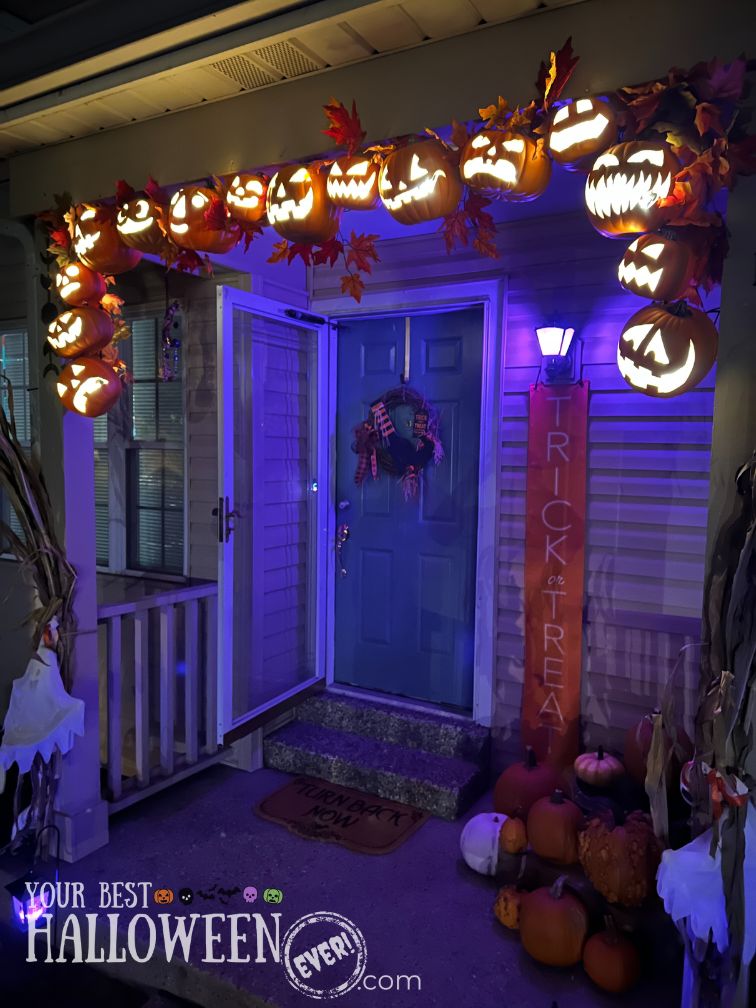
The arch ended up looking exactly the way I pictured it in my head without having to sacrifice the way the pumpkins were connected! It feels whimsical and magical and has a humble feel while also being impressive in person. It adds a ton of light and really captures the attention of walkers and passersby! The decision to stack the outer 3 pumpkins was the way to go and get the curved fitted feel of the “arch” and using the foliage to hide the wires was a very fun touch. I wish there were color changing lights, but other than that, it’s a perfect Halloween decor craft that provides a big impact and keeps the local normies amused and excited for Halloween. Now I’ve just gotta make one for the inside of my house so I get to enjoy it more!

And that’s a wrap on our DI-Fridays for Year Six! Before we pack up the craft bin from another fun-filled year of handmade magic, I just want to say a heartfelt thanks to those of you who follow along with this series. I cannot stress enough how incredible it feels to take an idea and make it into a tangible thing with your hands, and it was so awesome to see this year’s projects come together over the last several months. I hope we’ve inspired you to get crafty through the Halloween season and beyond. It’s not about perfection; it’s about the joy of making something uniquely yours. And I’ve said it before, but it’s always worth repeating: If you can think it, you can do it – and there’s no limits to creativity! Happy crafting!


Leave a comment